Java, Tomcat, and Eclipse for Web Development - Part II
Copyright © 2005
Yaodong Bi
Install and Configure Eclipse on Windows XP
1. Download latest version of Eclipse
Click the following link to download the latest version of Eclipse.
http://www.eclipse.org/downloads/index.php
2. Install Eclipse
There is no installation script or wizard for Eclipse. What
you need to do is unzip the downloaded file and then
copy the contents to a location. You can put it anywhere you wish,
but you are rcommended to save it to C:\. Now there should
be a folder named C:\eclicpse.
Add to global environment variable PATH: C:\eclipse
You may want to create a shortcut to C:\eclipse\eclipse.exe and put it on your Desktop or in Quick Launch so you can easily start Eclipse later on.
The screen snapshots in this tutorial were taken when Eclipse 3.1 was isntalled. As of
Sept. 30, 2006, Eclipse 3.2 is avaialble for Windows environment.
The following screen snapshots may appear differentl if Eclipse
3.2 is being installed.
3. Test Your Eclipse Installation
Run C:\eclipse\bin\eclipse.exe,
the Eclipse startup screen should
display. You are then asked to specify a workspace. A workspace
is a folder where all your projects will be located. I
suggest you choose a hard drive or a partition where all your data
files are located. For example, if you have a D:\ drive and normally you store all your data files there, then use D:\workspace as your workspace folder. Or you may choose the default folder as shown in the following screen snapshot.
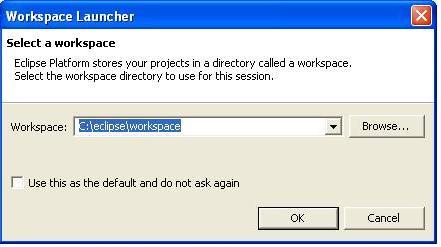
Click OK and then procced to setting your Java coding style.
4. Java Coding Style Settings
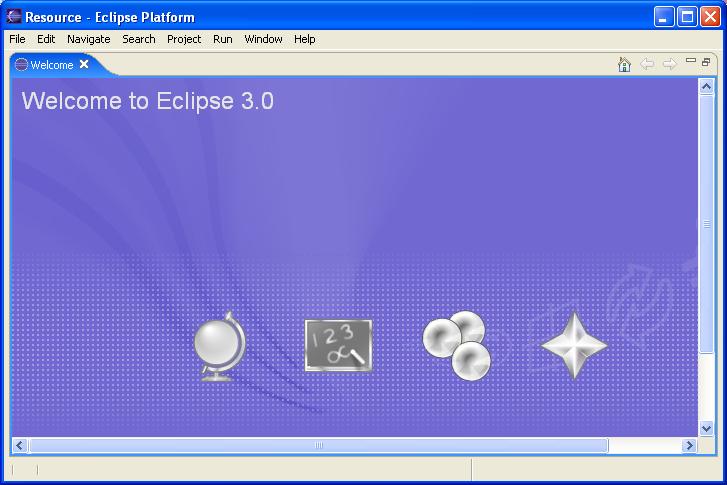
After you clicked OK on Select a workspace in the previous step, the following screen snapshot should show:
Eclipse
has a rich set of coding style settings you can configure to suit your
coding style. Here only shows an example. You are recommended to visit
this part again and explore the function of each different setting.
Show Line #: Select Window->Preference->Java->Editor, then select "Show line numbers"
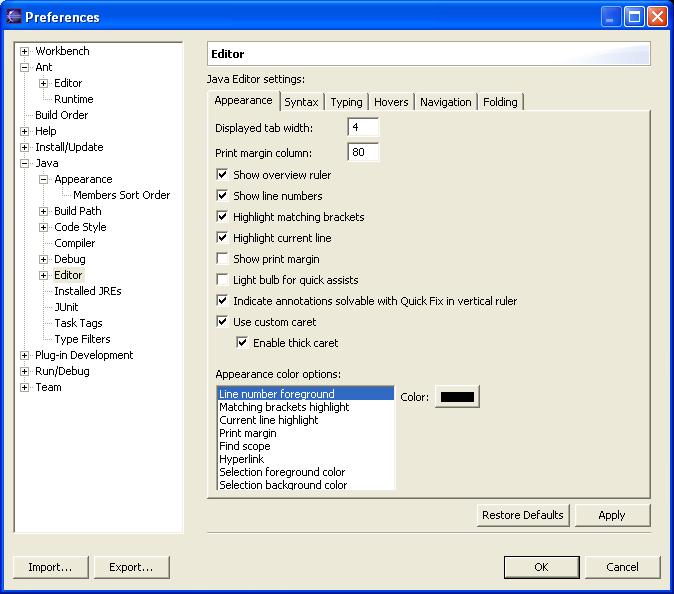 (java-editor-setup-3.jpg)
Code Formatter: After select Window->Preference->Java->Code Style->Code Formatter, click the Show button as shown in the following screen snapshot.
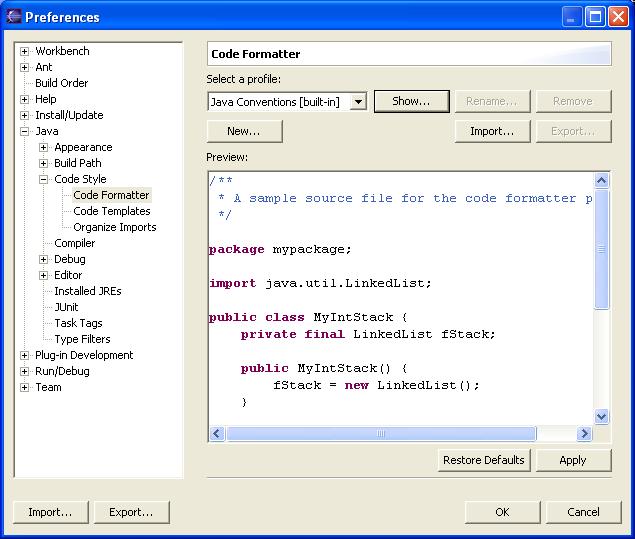
Navigate
through all the tabs for your preferred source code auto-format. If you
are not sure about any item, left it the way it is. You can always come
back later to change it.
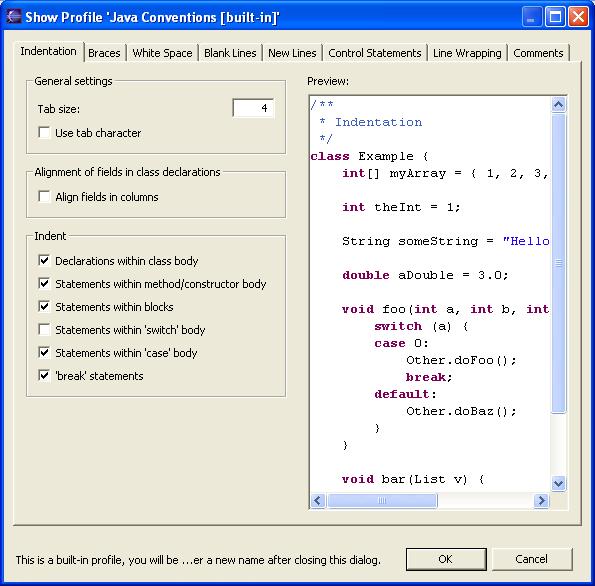
For example, I personally like to indent three spaces for each tab, so I changed Tab Size from 4 to 3.
After you have selected all the changes you like and click OK,
it will ask you to enter a name for this profile. You may use your last
name or any name, and this becomes your coding convention.
5. Start a New Project
Eclipse uses the concept of project to organize source
code files, library and jar files. You cannot just come in and create a
Java program and execute it. You must have it under a project. This
step shows how to start a project and add a simple Java program to test
your Eclipse.
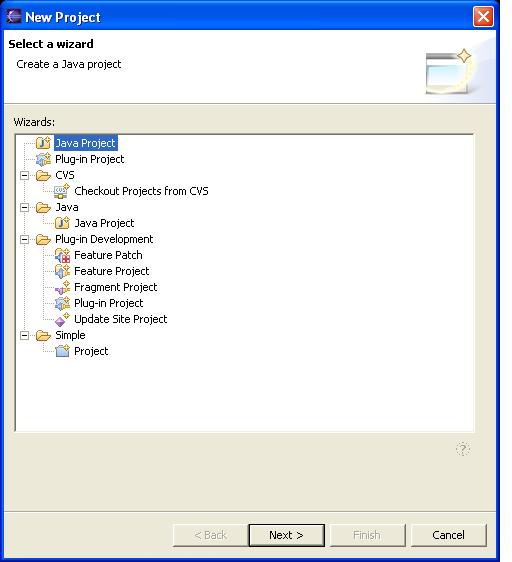
Project type: To create a new project, select File->New->Project, the
following screen shows up. You can use this project wizard to
create all different types of project. For example, later in this
tutorial your will find Tomcat (or Web Application) project in the list
and when you choose Tomcat Project as your project type,
Eclipse will create a folder structure and include most commonly needed
jar files automcatically into your project. You cannot create a Tomcat
project yet since you have not installed the Tomcat plugin for Eclipse,
which will be described in next part of the tutorial. For now and this
simple test project, you can choose Java Project from the highest project type hierarchy or Java Project under Java. Then click Next.
Project name: Now
you are asked to give a name to your project. You may want to use a
meaningful name just as you would when naming your Java class files and
variables. The project name is also used by Eclipse as the folder name where all the files of the project will be located. Here I simply use MyProject as the name. For now, choose the default Location and Project Layout
as shown in the following snapshot. As you know more about
Eclipse, you may change those options to suit your need.
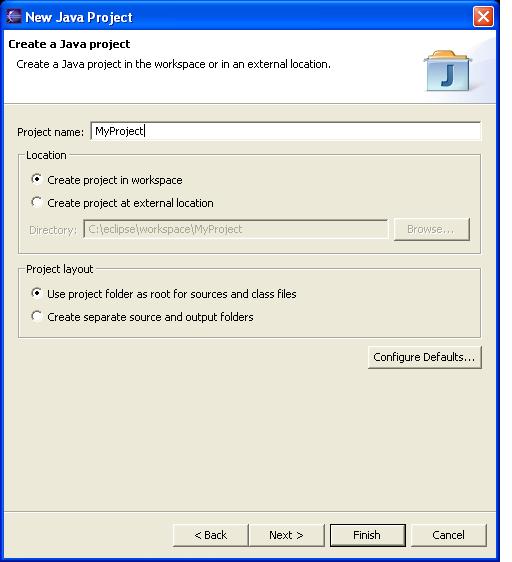
Now click Finish .
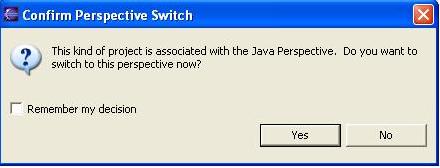
Perspective switch: The following screen of Confirm Perspective Switch may be displayed. If it does, just click Yes.
You are now only one step away from your first working Java program
using Eclipse. The following snapshot should display after you clicked Yes on the Confirm Perspective Switch window.

You may want to take a look at the different section/windows of the screen. Expand MyProject folder and you will find src is a subfolder, where you will store all source code files. The layout is ....
6. Add New Java Classes
Now you are ready to create a Java program under the project. Eclipse's wizard can help you create new Java classes.
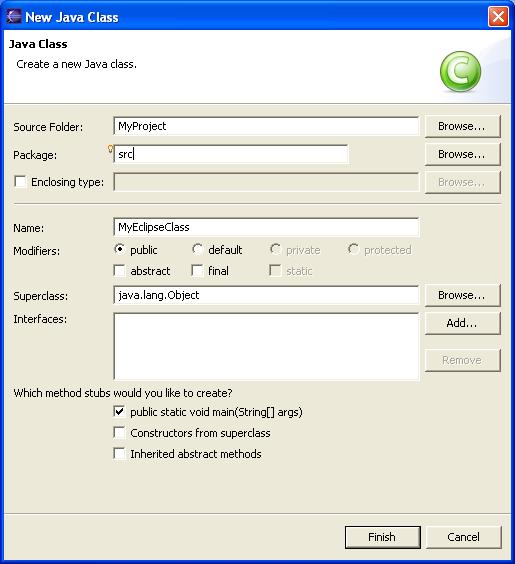
New Java class: Select File->New->Class, the following window shows up. Enter src for Package, MyEclipseClass as Name, which is the name of the Java class. Select public static void main(String[] args) and deselect Inherited abstract methods and Constructor from superclass.
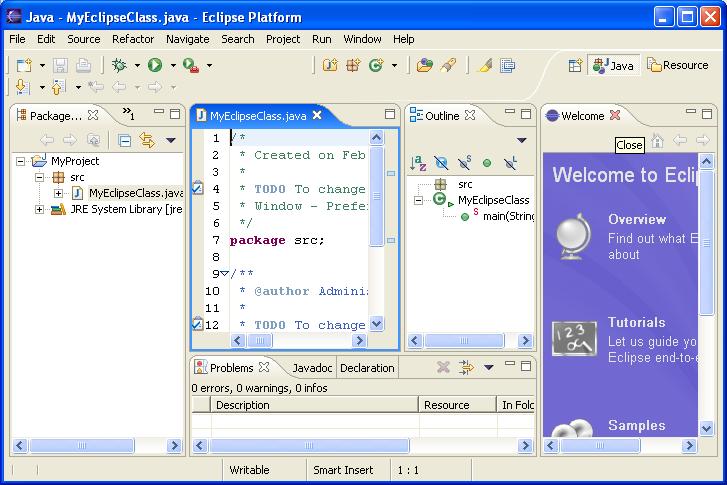
Click Finish. The following screen snapshot shows. You may want to close the Welcome window on the right to have more work space.
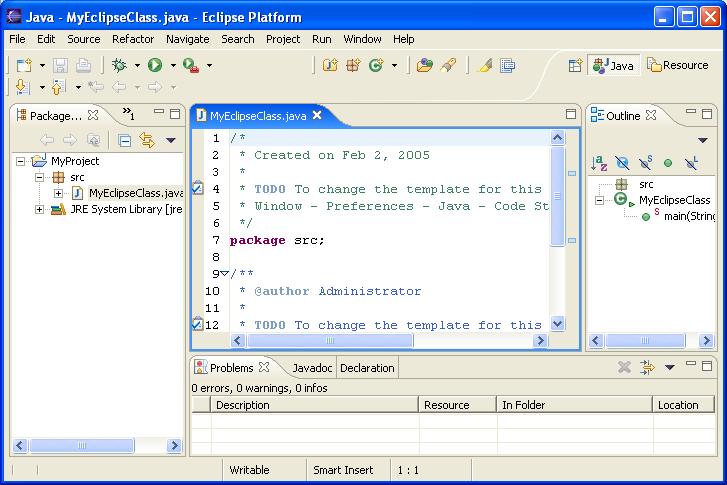
After the welcome window is closed, the following shows up and it is ready for you to edit your first Java program.
Edit Java program:
The middle pane of the above window is the Java program you just
created using the wizard. For any reason if it is not displayed, expand
MyProject folder on the left pane and then src folder then double click MyEclipseClass to put into editing mode.
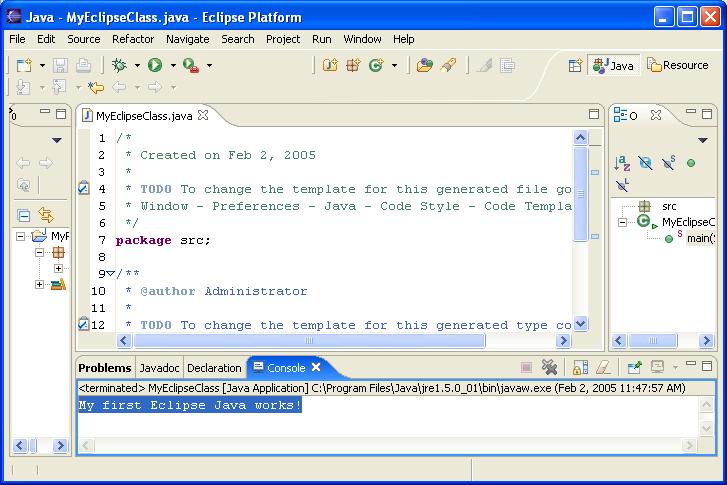
Enter a print statement in the main() operation as shown in blue in the following snapshot.

Run Java program:
You may wonder, how can I run the program without compiling it? When
you were editing the program, Eclipse has incrementally compiled your
program. If you had any syntax errors in the program, it would raise a
red flag on the left side of the editing pane. Try to make some syntax
errors and see what would show up.
To run the program, select Run->Run as->Java application.
If you did not save your file after any editing, Eclipse
will ask you whether you want to save the changes. click OK. The following snapshot gets displayed in the Console tab at the bottom pane of the window displays the output of your program. If Console tab is not selected, click it to activate it.
Congratulations, you have just successfully completed the installation of Eclipse.