Java, Tomcat, and Eclipse for Web Development - Part III 
Copyright © 2005
Yaodong Bi


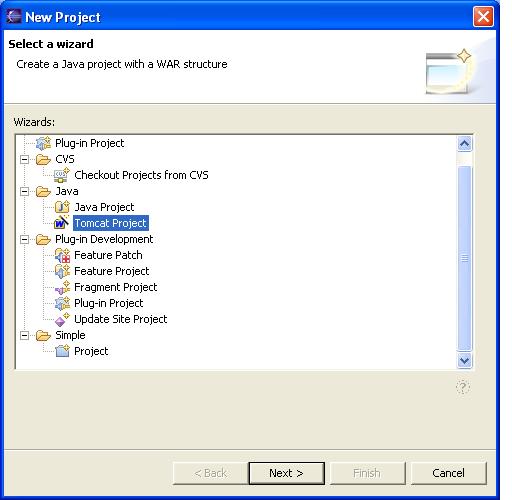
Install Tomcat Plugin for Eclipse on Windows XP

1. Download Tomcat plugin for Eclipse 
Click the following link to download the tomcat plugin for Eclipse.


http://www.sysdeo.com/sysdeo/content/download/657/7658/file/tomcatPluginV32beta.zip

Note: the above plugin is designed to work with Eclipse 3.2. If you have downloaded a different version of Eclipse you may want to check whether the one you download is compatible with the version of your Eclipse or not.

Unzip the downloaded file and copy its contents to C:\eclipse\plugins\,assuming that you installed Eclipse at C:\eclipse\.  Now folder  C:\eclipse\plugins\com.sysdeo.eclipse.tomcat_3.2.0.beta\ should exist.    

2. Configure Tomcat plugin for Eclipse
First close all Eclipse if there is any running. Start Eclipse. This would force Eclipse to freshly load all plugins from its plugins folder.

Goto Window->Preference, then expand Tomcat in the left column of the windows. If Tomcat is not shown in the list, you may want to check whether a folder named "com.sysdeo.eclipse.tomcat_3.0.0" exits in the plugins folder of the Eclipse. If not, carefully perform step 1 again.

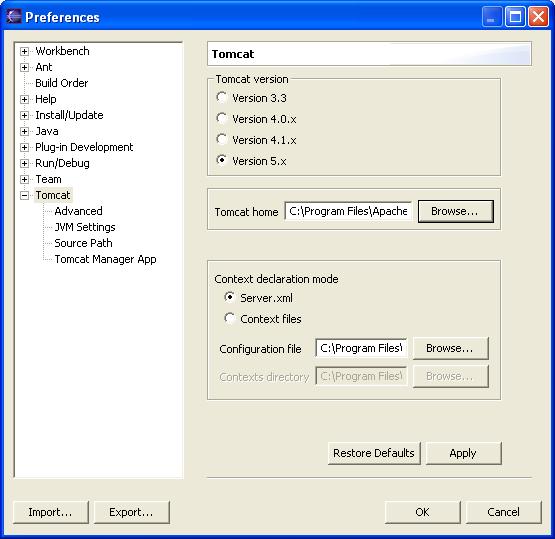
The folowing shows how to configure Tomcat at the top level, Tomcat, and Advanced, JVM Settings, Source Path, and Tomcat Manager App at the second level, as shown in the Preferences screen snapshot below.

Tomcat: Double click Tomcat in the left column, the following dialog box shows. If you followed this tutorial from the beginning, fill the information as shown.

     Select Version 5.x for Tomcation version.
     Enter C:\Program Files\Apache Software Foundation\Tomcat 5.5 for Tomcat home.
     Choose Server.xml  for Context. 
     Do not modify the Configuration file location. It is chosen automatically when you selected Tomcat home.

Tomcat plugin configuration


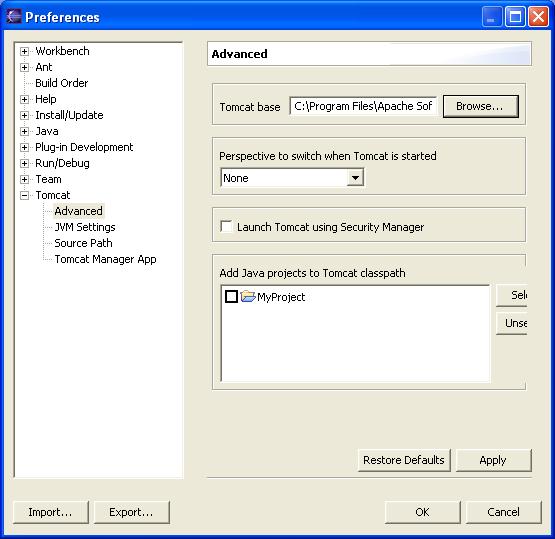
Advanced: Select Advanced under Tomcat in the left column, the following snapshot shows. You may set the Tomcat base to the same as tomcat home, which is default setting. If you are not familiar with Java Secuity, make sure Launch Tomcat using Security Manager deselected as shown below.

Tomcat Advanced tab


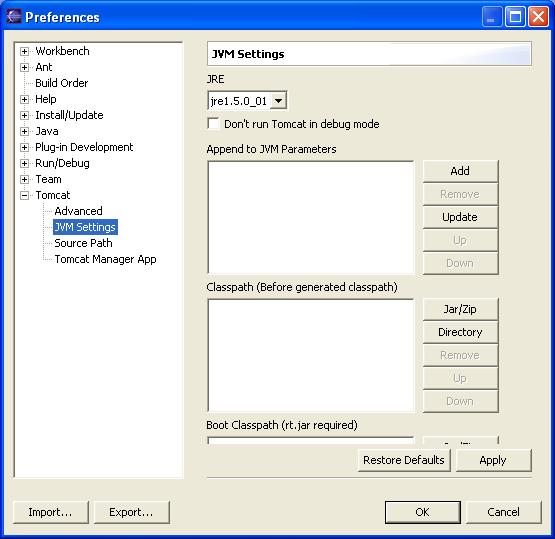
Java Settings:
   Select Java Settings under Tomcat in the left column, the following snapshot shows. The JRE entry should match what you have on your system.

Tomcat java settings


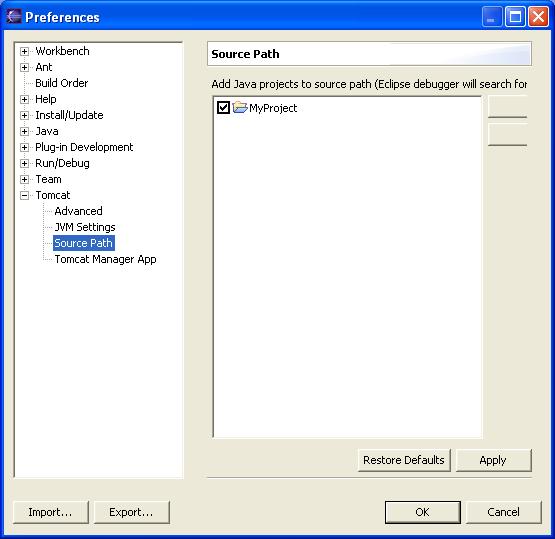
Source Path:
    Select Source Path under Tomcat in the left column.

Tomcat source path


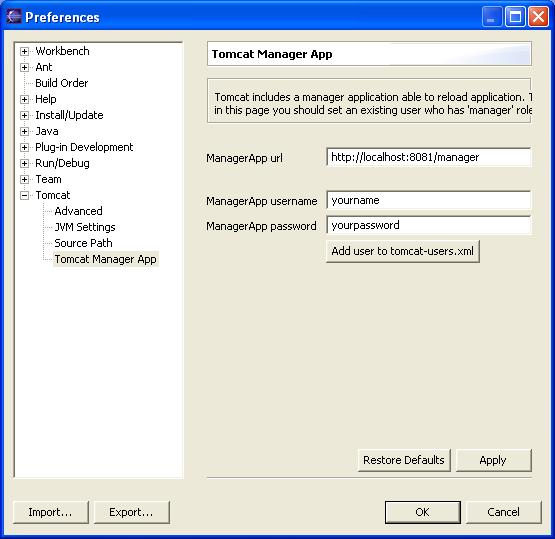
Tomcat Manager App:
  Select Tomcat Manager App under Tomcat in the left column. Enter a user name and password then click Add user to tomcat-users.xml button to add the manager to Tomcat permanently. You will use this pair of user name and password for application deployment later.

tomcat-users.xml is a Tomcat configuration file in XML stored in the conf directory in the Tomcat home. The file defines different roles such as admin, manager, etc and then specifies each user's name and password and roles the user may play. In this step, by adding the manager's user name and password to this file, one will be able to log in to Tomcat from a Web browser as a manager to remotely start, stop, restart, deploy any application under the Tomcat Web server.

Tomcat Manager


4. Click OK. Now the Tomcat plugin configuration is completed.

The following will show how to start a new Tomcat project.

5. Create a Tomcat project. Select File->New->Project and then select Tomcat Project as shown below.

Tomcat project


6. Click Next and then enter "MyTomcat" as Project Name as shown below. You may use whatever a name that is meaningful for your project.

project name


7. Click Next and then  enter "/MyTomcat" as Context Name then click Finish. The context name by default is the project name prefixed with a "/". After you click Next from previous screen, it should display the default context name, then just click Finish

Context name


Tomcat uses server.xml file stored in the $TOMCAT_HOME/conf directory for various configurations and one of them is to locate projects that are not placed in Tomcat's webapps folder. By selecting "Can update server.xml file" you allow Eclipse to add a line to the server.xml file such that your project is accessed by the Tomcat server from your project location directly without having a copy in Tomcat's webapps folder. This feature is very useful when you  use your local machine only for development (the production server is a different machine.) since there is no duplicate copy needed in the webapps directory for testing.

After clicking Finish, go to $TOMCAT_HOME/conf/server.xml file and you will find the following line added at the end of the file:

       <Context path="/MyTomcat" 
                reloadable="true"
                docBase="E:\eclipse\workspace\MyTomcat"
                workDir="E:\eclipse\workspace\MyTomcat\work"
       />

Path specifies the name you use in the URL to address the application in web browsers. DocBase tells Tomcat where to find the application, and workDir is a location for servlets to use. The reloadable attribute allows dynamic reloading of the application when it is true. Dynamic reloading means that whenever a changed file in WEB-INF/classes or WEB-INF/lib is found, Tomcat will reload the application.

By default Tomcat plugin assigns true to the reloadable attribute since it assumes the Tomcat used with Eclipse is NOT a production server. Determining whether files have been changed or not takes time aways from the Tomcat web server, thus it should only be employed in development environment. It should be turned off (reloadable="false") on a production server.

8. After clicking Finish from the previous screen, you should find MyTomcat project appear in the Package Explorer display as shown in the snapshot below.

new tomcat project workspace


9. You have successfully installed and configured Tomcat plugin for eclipse. Congratulations!

In next part of this tutorial you will download a sample Tomcat project.


<<<--- Previous page                     <<< Home page >>>                      Next page --->>>